Inspecting Sapling Root Health at Purchase
How do I check a sapling’s root health before buying?
A step-by-step guide to evaluating root health at purchase
Root inspection is the most critical part of buying a sapling. A tree with attractive stems and leaves but weak roots has a low chance of survival and growth. Follow these precise steps.
Action 1: Ask to inspect the roots
Politely but firmly ask the seller to remove the sapling from its pot or wrapping.
- Reputable seller: Will welcome the request and be confident in the product’s health.
- Unreliable seller: May refuse with excuses like “the sapling will get stressed” or “roots will be damaged.” This is a serious red flag.
Action 2: Visual inspection
Once the sapling is out, quickly evaluate:
Root color (the most important sign)
- Healthy: White, milky, or light cream — indicates active, healthy roots.
- Unhealthy: Dark brown, black, or gray — indicates rot, root suffocation (overwatering), or fungal disease.
Root structure and density
- Healthy: Abundant fine feeder roots (the thin, hair-like roots that absorb water and nutrients).
- Unhealthy: Mostly a few thick, woody roots with little to no fine roots.
Root spread and distribution
- Healthy: Evenly distributed throughout the entire potting volume.
- Unhealthy/root-bound (circling): Roots circle tightly along the pot walls and base, forming a dense, tangled mass. Such trees struggle to establish after planting.
Pests and diseases
- Healthy: Root surfaces are clean, with no unusual growths.
- Unhealthy: Small galls (nematodes), white/blue molds, or abnormal spots indicate disease.
Action 3: Tactile and olfactory inspection
Touch
- Healthy: Firm, resilient, and flexible; does not crumble to the touch.
- Unhealthy: Soft and slimy (rot) or dry and brittle (dead roots).
Smell
- Healthy: Fresh, pleasant “forest soil” scent.
- Unhealthy: Sour, sewer, or putrid odor — a sure sign of rot and anaerobic bacterial activity.
Quick checklist for root inspection
| Criterion | ✅ Healthy roots | ❌ Unhealthy roots (danger signs) |
| Color | White, cream, milky | Dark brown, black, gray |
| Structure | Many fine feeder roots | Only a few thick, woody roots |
| Density | Evenly distributed | Matted, circling at pot base/walls |
| Feel | Firm and flexible | Soft/slimy or dry/brittle |
| Smell | Natural soil aroma | Sour/rotten odor |
| Pests | Clean, no growths | Galls, mold, abnormal spotting |
Final recommendations
- Compare: Always remove and compare several saplings side by side to pick the best one.
- Bare-root stock: Much easier to assess. Ensure roots are wrapped in moist media (e.g., peat moss or damp sawdust) and have not dried out.
- Balled-and-burlapped (B&B): Full inspection is harder; check that the root ball is firm and cohesive, and inspect any exposed surface roots for healthy color and texture.
- Trust your gut: If you doubt root health, don’t buy. Investing in a healthy sapling saves later treatment or replacement costs.
How do I recognize root-bound or girdling roots?
At a glance:
- Root-bound/circling = roots spiral around the pot walls.
- Girdling root = a root that wraps around the collar or main roots and “strangles” them.
second checklist 60
- Remove from pot: The seller should allow it.
- Side walls: Are roots spiraling and hugging the inner pot surface?
- Pot base: Is there a dense “root mat” or a thick ring of roots around the perimeter?
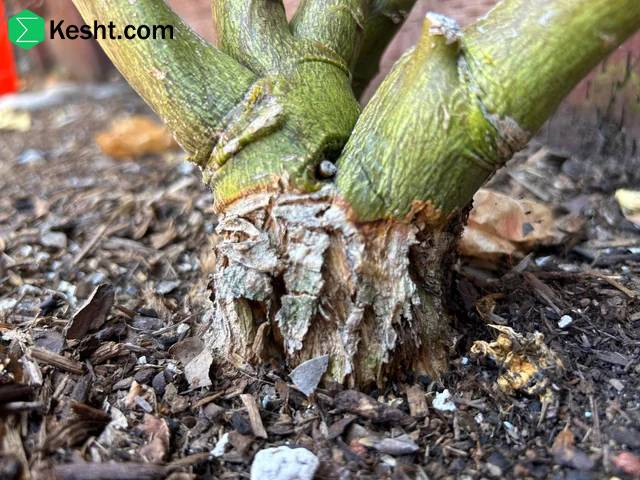
- Root collar flare: Do you see a visible root flare at the base? A trunk that plunges straight into the media with no flare is a serious warning.
- Roots crossing the collar: Any root running over or around the collar = girdling risk.
- Root-to-media ratio: If >60–70% of the side surface is just roots, it’s likely root‑bound.
- Drainage holes: Thick, woody roots emerging from holes = too long in the pot.
Signs by stock type
Container-grown
- Red flags:
- 360° rings along the sidewalls
- Felt-like root mat at the base
- Multiple thick (3–10 mm) roots circling the outer perimeter
- J-shaped roots (taproot turned and growing back up)
- Acceptable:
- A few loose, easily teased rings
- Abundant, evenly spread feeder roots

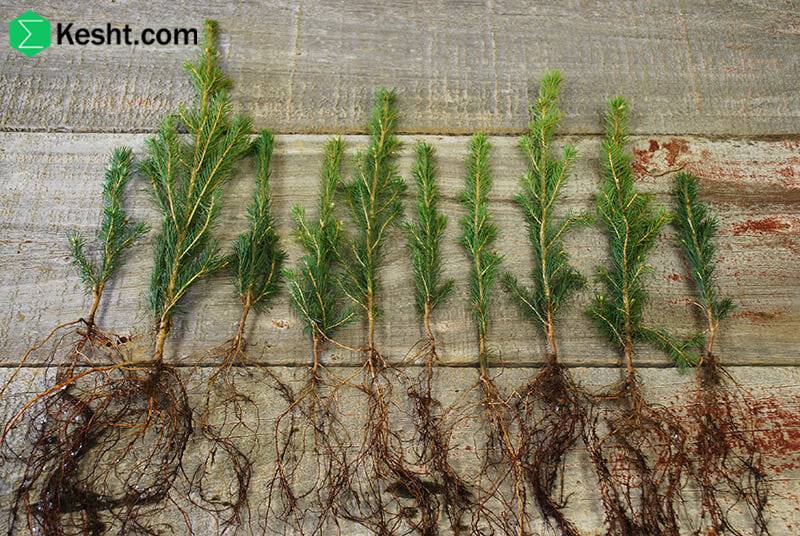
Bare-root
- Fan roots out like wheel spokes. O, S, or J curves, or roots wrapping around the collar, indicate problems.
- Only a few thick roots with few feeder roots = high risk of poor establishment.
Balled-and-burlapped (B&B)
- Carefully scrape away 3–5 cm of soil at the top of the ball to locate the first structural roots. If they’re very deep, or a root skirts around the collar, girdling risk is high.
- The ball should be firm and intact; palpable circling rings around the perimeter are a warning.
Simple field tests
- Side squeeze test: If your finger can barely penetrate the outer layer because a “thick root ring” makes a felted sleeve, root‑bound is likely.
- Shake test: If, after sliding out of the pot, the cylinder shape holds due to tight outer rings, that’s advanced binding.
- Collar inspection: The trunk should not enter the media like a straight dowel; a slight flare must be visible above the surface. Any surface root wrapping the collar = reject.
Severity grading and purchase decision
- Mild (fixable): Few shallow, fine rings + many feeder roots.
Action: Manually tease open rings; light root pruning.
- Moderate (borderline): Multiple rings with some semi‑woody roots outside.
Action: Shave 1–2 cm from the sides and 0.5–1 cm from the base; make 3–4 shallow vertical scores; spread roots radially.
- Severe (do not buy): Thick, woody outer rings; girdling root over the collar; rigid J‑shaped taproot.
Action: Do not purchase — high risk of mortality or chronic problems.
If you must buy — corrective steps at planting
- Container-grown: Shave 1–2 cm from all sides and 0.5–1 cm from the bottom to remove outer rings; make 3–4 vertical cuts (1–2 cm deep); spread roots radially over a central mound in the planting hole.
- Bare-root: Completely open or remove loops; shorten damaged roots back to white, healthy tissue; arrange radially.
- Always ensure the root collar is visible at finished grade; burying the collar increases risks of girdling and suffocation